
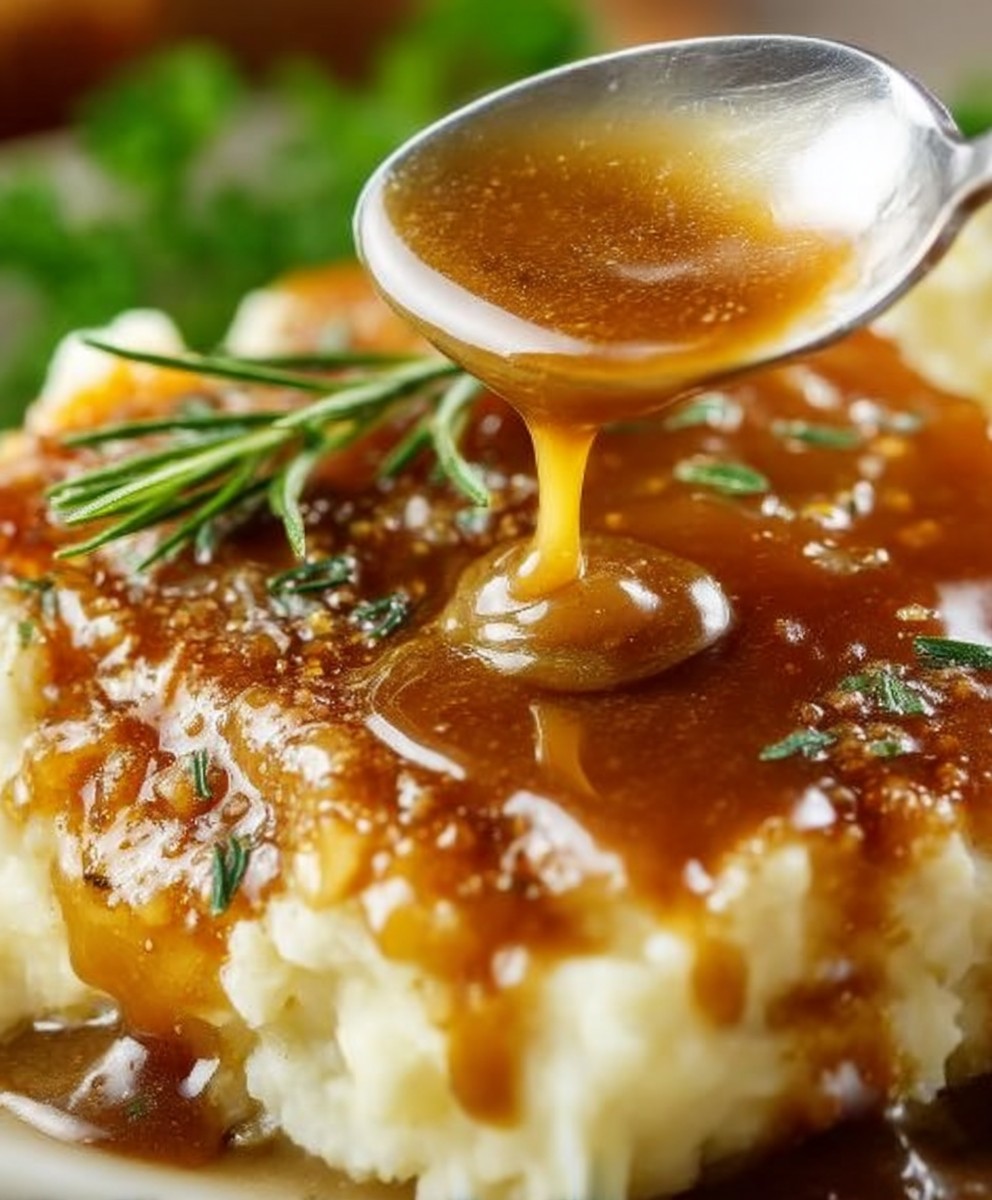
Homemade brown gravy is a culinary delight that can elevate any meal from ordinary to extraordinary. Whether you’re drizzling it over mashed potatoes, smothering it on meatloaf, or using it as a dip for biscuits, this rich and savory sauce is a staple in many households. The history of brown gravy dates back to the early days of cooking, where it was often made from the drippings of roasted meats, showcasing the resourcefulness of home cooks who wanted to make the most of their ingredients.
People love homemade brown gravy not just for its deep, comforting flavor, but also for its velvety texture that brings warmth to any dish. It’s incredibly convenient to whip up, requiring just a few simple ingredients that you likely already have in your pantry. Plus, making it from scratch allows you to customize the seasoning to your liking, ensuring that every batch is uniquely yours. Join me as we explore the simple steps to create this delicious sauce that will surely become a favorite in your kitchen!

Ingredients:
- 1/4 cup unsalted butter
- 1/4 cup all-purpose flour
- 2 cups beef broth (or chicken broth for a lighter flavor)
- 1 tablespoon Worcestershire sauce
- 1 teaspoon garlic powder
- 1 teaspoon onion powder
- Salt and pepper to taste
- Optional: 1/2 teaspoon dried thyme or rosemary for added flavor
Preparing the Roux
- In a medium saucepan, melt the butter over medium heat. Make sure it doesn’t brown; we want it just melted.
- Once the butter is melted, add the flour to the pan. Stir continuously with a whisk or wooden spoon to combine the butter and flour. This mixture is called a roux.
- Cook the roux for about 2-3 minutes, stirring constantly. You want it to turn a light golden color, which will help develop the flavor of the gravy.
Adding the Broth
- Gradually pour in the beef broth while whisking continuously. This helps to prevent lumps from forming.
- Once all the broth is added, continue to whisk until the mixture is smooth and begins to thicken. This should take about 5-7 minutes.
- After the gravy has thickened, stir in the Worcestershire sauce, garlic powder, and onion powder. These ingredients will enhance the flavor of your gravy.
Seasoning the Gravy
- Now it’s time to season your gravy. Start by adding salt and pepper to taste. I usually start with about 1/2 teaspoon of each and adjust from there.
- If you want to add a bit more depth to the flavor, consider adding the optional dried thyme or rosemary. Stir well to incorporate.
- Let the gravy simmer on low heat for an additional 5 minutes, stirring occasionally. This allows the flavors to meld together beautifully.
Final Adjustments
- After simmering, taste the gravy and adjust the seasoning if necessary. If it’s too thick, you can thin it out with a little more broth or water.
- If you prefer a smoother gravy, you can strain it through a fine-mesh sieve to remove any lumps or bits of flour.
- Once you’re satisfied with the flavor and consistency, remove the gravy from the heat.
Serving Suggestions
Your homemade brown gravy is now ready to be served! Here are some delicious ways to enjoy it:
- Over mashed potatoes for a classic comfort food dish.
- As a topping for meatloaf or roasted meats.
- Drizzled over biscuits for a hearty breakfast.
- As a dipping sauce for fried foods like chicken tenders or onion rings.
Storage Tips
If you have any leftover gravy, you can store it in an airtight container in the refrigerator for up to 3 days. To reheat, simply warm it on the stove over low heat, adding a splash of broth or water to loosen it up if necessary.
Variations
Feel free to customize your brown gravy to suit your taste! Here are a few ideas:
- Mushroom Gravy: Add sautéed mushrooms to the gravy for an earthy flavor.
- Onion Gravy: Sauté sliced onions in the butter before adding the flour for a sweet onion flavor.
- Spicy Gravy: Add a pinch of cayenne pepper or hot sauce for a kick.
With this homemade brown gravy recipe, you’ll have a delicious sauce that elevates any meal. Enjoy the rich flavors and the satisfaction of making it from scratch
Conclusion:
If you’re looking for a comforting and delicious addition to your meals, this homemade brown gravy is an absolute must-try! Not only is it incredibly easy to make, but it also elevates any dish it accompanies, transforming simple ingredients into a rich and flavorful experience. The depth of flavor achieved through the combination of sautéed onions, garlic, and the perfect blend of seasonings makes this gravy a standout. Whether you’re serving it over mashed potatoes, roasted meats, or even a hearty vegetable dish, this gravy will undoubtedly become a staple in your kitchen.
For serving suggestions, consider pairing this homemade brown gravy with classic comfort foods like meatloaf, turkey, or chicken fried steak. It also works wonderfully drizzled over biscuits for a delightful breakfast treat. If you’re feeling adventurous, try adding a splash of red wine or a dash of Worcestershire sauce to the gravy for an extra layer of flavor. You can also experiment with different herbs and spices, such as thyme or rosemary, to customize the taste to your liking.
I encourage you to give this homemade brown gravy a try! It’s a simple recipe that yields impressive results, and I’m confident that once you make it, you’ll wonder how you ever lived without it. Don’t forget to share your experience with friends and family; they’ll be eager to know your secret to such a delicious addition to their meals. If you have any variations or tips of your own, I’d love to hear them!
So, roll up your sleeves and get ready to whip up this delightful homemade brown gravy. It’s the perfect way to add warmth and flavor to your dining table, and I can’t wait for you to enjoy it as much as I do. Happy cooking!
Homemade Brown Gravy: A Simple Recipe for Delicious Flavor
This homemade brown gravy is a rich and flavorful sauce that's easy to prepare. Ideal for drizzling over mashed potatoes, meatloaf, or biscuits, it adds a delicious depth to any meal. With simple ingredients like butter, flour, and beef broth, you can create a versatile sauce that enhances your favorite dishes.
Ingredients
- 1/4 cup unsalted butter
- 1/4 cup all-purpose flour
- 2 cups beef broth (or chicken broth for a lighter flavor)
- 1 tablespoon Worcestershire sauce
- 1 teaspoon garlic powder
- 1 teaspoon onion powder
- Salt and pepper to taste
- Optional: 1/2 teaspoon dried thyme or rosemary for added flavor
Instructions
- In a medium saucepan, melt the butter over medium heat. Make sure it doesn’t brown; we want it just melted.
- Once the butter is melted, add the flour to the pan. Stir continuously with a whisk or wooden spoon to combine the butter and flour. This mixture is called a roux.
- Cook the roux for about 2-3 minutes, stirring constantly, until it turns a light golden color.
- Gradually pour in the beef broth while whisking continuously to prevent lumps from forming.
- Continue to whisk until the mixture is smooth and begins to thicken, about 5-7 minutes.
- Stir in the Worcestershire sauce, garlic powder, and onion powder to enhance the flavor.
- Season the gravy with salt and pepper to taste, starting with about 1/2 teaspoon of each.
- If desired, add the optional dried thyme or rosemary and stir well.
- Let the gravy simmer on low heat for an additional 5 minutes, stirring occasionally.
- Taste the gravy and adjust the seasoning if necessary. If it’s too thick, thin it out with a little more broth or water.
- For a smoother gravy, strain it through a fine-mesh sieve to remove any lumps.
- Once satisfied with the flavor and consistency, remove the gravy from the heat.
Notes
- Store any leftover gravy in an airtight container in the refrigerator for up to 3 days.
- Reheat on the stove over low heat, adding a splash of broth or water if necessary.
- For a smoother gravy, strain it through a fine-mesh sieve to remove any lumps.
- If it’s too thick, thin it out with a little more broth or water.
- For an earthy flavor, add sautéed mushrooms to make mushroom gravy.
- For onion gravy, sauté sliced onions in the butter before adding the flour.
- Add a pinch of cayenne pepper or hot sauce for a spicy kick.
{
“@context”: “https://schema.org”,
“@type”: “Recipe”,
“name”: “Homemade Brown Gravy: A Simple Recipe for Delicious Flavor”,
“description”: “This homemade brown gravy is a rich and flavorful sauce that’s easy to prepare. Ideal for drizzling over mashed potatoes, meatloaf, or biscuits, it adds a delicious depth to any meal. With simple ingredients like butter, flour, and beef broth, you can create a versatile sauce that enhances your favorite dishes.”,
“prepTime”: “PT10M”,
“cookTime”: “PT15M”,
“totalTime”: “PT25M”,
“recipeYield”: “2 cups”,
“recipeIngredient”: [
“1/4 cup unsalted butter”,
“1/4 cup all-purpose flour”,
“2 cups beef broth (or chicken broth for a lighter flavor)”,
“1 tablespoon Worcestershire sauce”,
“1 teaspoon garlic powder”,
“1 teaspoon onion powder”,
“Salt and pepper to taste”,
“Optional: 1/2 teaspoon dried thyme or rosemary for added flavor”
],
“recipeInstructions”: [
{
“@type”: “HowToStep”,
“text”: “In a medium saucepan, melt the butter over medium heat. Make sure it doesn’t brown; we want it just melted.”
},
{
“@type”: “HowToStep”,
“text”: “Once the butter is melted, add the flour to the pan. Stir continuously with a whisk or wooden spoon to combine the butter and flour. This mixture is called a roux.”
},
{
“@type”: “HowToStep”,
“text”: “Cook the roux for about 2-3 minutes, stirring constantly, until it turns a light golden color.”
},
{
“@type”: “HowToStep”,
“text”: “Gradually pour in the beef broth while whisking continuously to prevent lumps from forming.”
},
{
“@type”: “HowToStep”,
“text”: “Continue to whisk until the mixture is smooth and begins to thicken, about 5-7 minutes.”
},
{
“@type”: “HowToStep”,
“text”: “Stir in the Worcestershire sauce, garlic powder, and onion powder to enhance the flavor.”
},
{
“@type”: “HowToStep”,
“text”: “Season the gravy with salt and pepper to taste, starting with about 1/2 teaspoon of each.”
},
{
“@type”: “HowToStep”,
“text”: “If desired, add the optional dried thyme or rosemary and stir well.”
},
{
“@type”: “HowToStep”,
“text”: “Let the gravy simmer on low heat for an additional 5 minutes, stirring occasionally.”
},
{
“@type”: “HowToStep”,
“text”: “Taste the gravy and adjust the seasoning if necessary. If it’s too thick, thin it out with a little more broth or water.”
},
{
“@type”: “HowToStep”,
“text”: “For a smoother gravy, strain it through a fine-mesh sieve to remove any lumps.”
},
{
“@type”: “HowToStep”,
“text”: “Once satisfied with the flavor and consistency, remove the gravy from the heat.”
}
],
“aggregateRating”: {
“@type”: “AggregateRating”,
“ratingValue”: “5”,
“ratingCount”: “369”,
“bestRating”: “5”,
“worstRating”: “1”
},
“datePublished”: “2025-12-08”
}
Sourdough Discard Bagels

Transform sourdough discard into gloriously chewy bagels! This recipe uses a cold proof for deep flavor and easy handling. Full instructions and nutrition are included.
- Prep Time: 15 minutes
- Cook Time: 20 minutes
- Total Time: 35 minutes
- Yield: 4 servings 1x
- Method: Stovetop
- Cuisine: American
Ingredients
- 1 cup (240g) sourdough discard
- 3 ½ cups (420g) bread flour
- ½ cup (120ml) warm water (105-115°F / 40-46°C)
- 1 ½ teaspoons active dry yeast
- 2 tablespoons granulated sugar (divided)
- 1 ½ teaspoons fine sea salt
- 1 tablespoon baking soda
Instructions
- Step 1: In a large bowl or the bowl of a stand mixer, combine the warm water, yeast, and 1 teaspoon of the granulated sugar. Let sit for 5-10 minutes until foamy. Add the sourdough discard, remaining 1 tablespoon plus 2 teaspoons of granulated sugar, salt, and bread flour. Mix on low speed with a dough hook (or by hand) until a shaggy dough forms, then increase speed and knead for 8-10 minutes until the dough is smooth, elastic, and pulls away from the sides of the bowl.
- Step 2: Lightly oil a clean bowl, place the dough in it, and turn to coat. Cover the bowl with plastic wrap or a damp towel and let rise in a warm place for 1-1.5 hours, or until slightly puffy. Punch down the dough gently, re-cover, and refrigerate for at least 4 hours or preferably overnight. This cold proof develops flavor and makes the dough easier to handle.
- Step 3: Remove the chilled dough from the refrigerator. Divide the dough into 8-10 equal pieces. Roll each piece into a smooth ball, then gently poke a hole through the center with your thumb. Stretch the hole to about 1 to 1.5 inches in diameter, creating the classic bagel shape. Place the shaped bagels on a lightly floured or parchment-lined baking sheet, cover loosely with plastic wrap, and let rest at room temperature for 20-30 minutes while preparing for boiling.
- Step 4: Preheat your oven to 425°F (220°C). Bring a large pot of water to a rolling boil. Add the baking soda and the remaining 1 teaspoon of granulated sugar to the boiling water. Carefully drop 2-3 bagels into the boiling water at a time, being careful not to overcrowd the pot. Boil for 30-60 seconds per side, then use a slotted spoon to remove the bagels, letting excess water drain off, and return them to the baking sheet.
- Step 5: (Optional: For extra shine and seed adherence, whisk one egg with a tablespoon of water for an egg wash and brush over the boiled bagels. Sprinkle with desired toppings like sesame seeds, poppy seeds, or everything bagel seasoning). Bake the bagels for 18-22 minutes, or until they are golden brown and cooked through. Transfer to a wire rack to cool completely before slicing and serving.
Notes
- Keep your cooled bagels fresh in an airtight container at room temperature for up to 2 days, or slice and freeze them for up to a month to enjoy later.
- To bring back that perfect chew and crisp crust, slice your bagels and pop them in the toaster straight from the freezer or after a day or two at room temperature.
- These homemade bagels are fantastic with your favorite cream cheese, but for a unique twist, try them with a smear of labneh and a sprinkle of fresh dill to complement the sourdough tang.
- For the best flavor and easiest shaping, truly commit to that overnight cold proof; it deepens the sourdough tang and firms up the dough beautifully.
Nutrition
- Serving Size: 1 bagel (approx. 110g)
- Calories: 270
- Sodium: 420mg
- Fat: 1.5g
- Saturated Fat: 0.3g
- Trans Fat: 0g
- Protein: 4g


Leave a Comment