
If you think making candy is just boiling sugar, you haven’t met the wild, wonderful world of pulling. This isn’t just a recipe; it’s a family reunion activity, and the sticky reward is utterly worth the wrist workout. Today, we conquer the glorious, melt-in-your-mouth delight known asKentucky Cream Pull Candy: A Sweet Tradition You Need to Try. Forget store-bought taffy; this vintage confection boasts a rich, creamy flavor and a satisfying chewiness that truly earns its title as a beloved Appalachian staple.
- Experience the rich, old-fashioned butter and vanilla flavor profile that instantly transports you back to grandma’s kitchen on a chilly autumn day.
- The recipe is surprisingly straightforward, relying on simple pantry staples and requiring patience more than complicated techniques for perfect results.
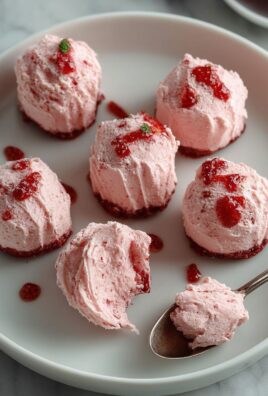
- Achieve that signature, opaque, snowy white appearance and delightfully airy, yet creamy, melt-in-your-mouth texture that defines this classic treat.
- This pulled candy offers impressive versatility, making it perfect for holiday gifts, dessert table showstoppers, or just a deeply satisfying afternoon snack.
The Sticky Saga of Cream Pull Candy
I remember the first time I tried to make this candy. It involved a lot of sugar, a surprising amount of upper-body strength, and an emergency trip to the hardware store for mineral spirits to remove the residual sugar cement from my kitchen counter. Seriously, if you have children or highly curious pets, consider them sticky hazards during this process. But here is the magnificent truth: the effort transforms simple ingredients—sugar, cream, butter—into an ethereal, light confection that traditional hard candy simply cannot match. It’s the texture, folks. That signature pull and snap that defines this Appalachian favorite, often called “taffy” by those who haven’t experienced the real, creamy deal.
Pulling candy is less about technical perfection and more about performance art. It’s a messy, cathartic kitchen activity perfect for a rainy afternoon. Many people think you need specialized equipment, but really, you need a sturdy countertop and two willing hands (or four, if you trust your spouse not to eat the developing candy before the pulling is finished). We need to talk temperature, though, because getting the syrup just right is the key to avoiding both rock-hard dental disasters and runny puddles of sweet disappointment. The goal is to hit that “soft-ball” stage perfectly.
Mastering the Heat: Why Precision Matters
The success of true, high-quality pulled candy hinges almost entirely on reaching the correct temperature: 240°F (115°C). This is the soft-ball stage, where the sugar concentration is ideal for pulling. If you go too high, say 250°F (121°C), you’ll overshoot, and the candy will harden too quickly, resisting all your mighty pulling efforts. If you stop too early, it never achieves that beautiful, firm texture necessary for stretching and incorporating air. Think of your candy thermometer as your co-pilot on this culinary journey; it’s non-negotiable.
But temperature control doesn’t stop once the mixture is cooked. Cooling is equally critical. You can’t start pulling molten lava, tempting though it might be. The mixture needs to cool down to a handling temperature, ideally around 110°F (43°C). This process takes patience. Spread the mixture onto a well-buttered surface—a marble slab or a large, sturdy baking sheet works perfectly—and let it rest. This resting period allows the crystallization to begin evenly, setting the stage for the massive volume increase that the pulling creates.
The Art of the Pull: Aeration and Transformation
Why do we pull candy? Because magic happens! When you stretch the cooled, semi-firm sugar mass, you incorporate countless tiny air bubbles. These bubbles are what turn the translucent, slightly yellowish mass into that gorgeous, opaque, snowy white color. Furthermore, the pulling process realigns the sugar crystals, creating a wonderfully smooth, non-gritty texture that simply melts on your tongue. The flavor intensifies, too, as the fat from the cream and butter is emulsified throughout the entire structure.
When you start pulling, handle the mass like you mean it, but gently. Fold it over, stretch it out, twist it, and fold it back again. Imagine kneading dough, but with a highly elastic, sweet material. You’ll notice the color lightening almost immediately. If you have helpers, split the mass into smaller pieces, but ensure everyone keeps pulling steadily. You know you’re finished when the candy has turned a satiny, brilliant white, resists stretching too easily, and starts to hold its shape firmly. This effort is why people call thisKentucky Cream Pull Candy: A Sweet Tradition You Need to Try—it truly builds character, and a very strong forearm.
Essential Tools for Making Perfect Pull Candy
While this recipe focuses on simple ingredients, a few tools make the difference between candy heaven and kitchen catastrophe. Investing in the right equipment saves you headache, heartache, and scrubbing time later. First and foremost, a heavy-bottomed saucepan is vital. It distributes heat evenly, preventing scorching, which is the nemesis of all candy makers. Scorched sugar tastes awful, and there is no coming back from it; you must start over.
Next, as mentioned earlier, a reliable candy thermometer is paramount. Digital versions offer rapid readings, but even a quality glass or metal rod thermometer works, provided you calibrate it first by testing boiling water. Finally, you will need a well-buttered surface for cooling. Marble is traditional because it holds the cold, but a professional-grade silicone mat or an inverted, buttered baking sheet works just fine in a pinch. Just make sure the surface is large, clean, and prepped before your candy mixture reaches temperature.
Remember, preparation is 80% of candy making success. Clear your space, butter your hands (generously!), and put on some upbeat music because you are about to embark on a sweet pulling adventure that might feel like a wrestling match with a sugary blob, but the payoff is legendary. This sweet, slightly chewy, and instantly dissolving treat is the reward for your dedication.
Ingredients for Kentucky Cream Pull Candy: A Sweet Tradition You Need to Try
Here’s what you’ll need to make this delicious dish:
- Granulated SugarThis provides the foundational structure of the candy; use standard white granulated sugar for the best clarity and taste.
- Light Corn SyrupAdding corn syrup prevents excessive crystallization, ensuring a smoother texture and helping the candy remain pliable for pulling.
- Heavy CreamThe cream contributes richness and the signature “cream” texture, distinguishing this from traditional hard taffy; full-fat cream is essential here.
- Unsalted ButterButter adds a deep, satisfying flavor and helps prevent the candy from sticking to the pot and your hands during the cooling and pulling stages.
- WaterNeeded initially to dissolve the sugar completely before boiling begins, ensuring even heating throughout the syrup mixture.
- Pure Vanilla PowderIntroduced after the boiling process, vanilla provides the characteristic warmth and sweetness that makes this candy irresistible.
- SaltJust a tiny pinch balances the overwhelming sweetness of the sugar, enhancing the overall depth of flavor.
The full ingredients list, including measurements, is provided in the recipe card directly below.
How to Make Kentucky Cream Pull Candy: A Sweet Tradition You Need to Try
Follow these simple steps to prepare this delicious dish:
Step 1: Combine and Heat the Base Mixture
In a large, heavy-bottomed saucepan, combine the sugar, corn syrup, heavy cream, water, and salt. Stir constantly over medium heat until the sugar fully dissolves. Once dissolved, stop stirring and insert your candy thermometer. Increase the heat slightly and allow the mixture to boil steadily until it reaches exactly 240°F (115°C)—the soft-ball stage. Do not scrape down the sides while boiling, as this can introduce crystals.
Step 2: Cool and Introduce Flavor
Immediately remove the saucepan from the heat once it reaches 240°F (115°C). Stir in the butter and the pure vanilla powder until fully incorporated. Pour the entire hot mixture onto a large, buttered surface—a marble slab or large baking sheet works best. Allow the mixture to cool undisturbed until it reaches a handling temperature of about 110°F (43°C). This cooling period is essential for proper structure development.
Step 3: Begin the Pulling Process
Butter your hands generously. Test the candy by folding a small edge—it should be firm enough to handle without burning you but still pliable. Gather the mass and begin pulling. Stretch the candy out into a long rope, fold it back onto itself, twist it, and repeat this motion continuously. You are aiming to incorporate air and realign the sugar crystals. If the candy becomes too firm while pulling, you can briefly place it under a heat lamp or close to a warm oven to soften it slightly.
Step 4: Achieve the Creamy White Color and Cut
Continue pulling until the candy turns opaque, pale white, and holds a satiny sheen, usually taking between 10 to 15 minutes of continuous pulling. Once the candy is pulled sufficiently, it will become quite firm. Stretch the finished candy into a long rope, about 3/4 inch thick. Use buttered scissors or a sharp knife to quickly cut the rope into bite-sized pieces, roughly 1 inch long.
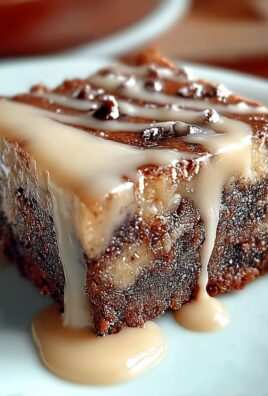
Transfer to plates and drizzle with sauce for the perfect finishing touch.
Troubleshooting Common Pull Candy Mistakes
Candy making can be intimidating, but most problems arise from temperature issues or impatience. If your candy turned out grainy, it means sugar crystals formed early in the process, likely due to stirring the syrup while boiling or not using enough corn syrup. To prevent this, ensure all crystals are washed down from the pot sides before boiling begins and resist stirring after the mixture boils.
If your candy is too sticky, you probably stopped heating it too early, before it hit the full 240°F (115°C) mark. Too hard, and you overheated it past 250°F (121°C). Always rely on your thermometer, not just intuition. Another common issue is uneven cooling; if one part cools faster than the other, the pulling texture will be inconsistent. To combat this, periodically fold the edges of the cooling candy into the center to equalize the temperature across the slab before you begin pulling.
What if I Don’t Have a Marble Slab?
Don’t panic! While a marble slab is ideal because it pulls heat away quickly and evenly, a large metal baking sheet placed upside down works beautifully. Simply ensure you butter it exceptionally well or line it with a heavy-duty silicone mat that has also been lightly greased. The goal is a non-stick, wide-open surface for fast and even cooling.
Frequently Asked Questions About Kentucky Cream Pull Candy
How long does Kentucky Cream Pull Candy last?
When stored properly in an airtight container at room temperature, this candy remains fresh and chewy for up to two weeks. Avoid storing it in the refrigerator, as the humidity can cause it to become sticky and lose its structural integrity.
Can I add different flavors to the pull candy?
Absolutely! While vanilla is traditional, you can substitute extracts. Try adding a few drops of high-quality lemon or maple extract alongside the vanilla right before cooling. Ensure you use oil-based extracts if possible, as water-based extracts can sometimes affect the sugar consistency.
Is the pulling process mandatory?
Yes, the pulling process is entirely mandatory for this specific recipe. Without pulling, you will simply have a very soft, creamy, fudge-like chew rather than the unique airy, satiny texture and bright white color that defines this amazing confection,Kentucky Cream Pull Candy: A Sweet Tradition You Need to Try.
Can I use butter substitutes?
For the signature richness and texture, we strongly recommend sticking to unsalted butter and heavy cream. Margarine or low-fat dairy alternatives simply do not contain the necessary fat content to create the desired smoothness and pull in this traditional recipe.
Enjoy the process, embrace the mess, and savor the reward. This recipe is more than a dessert; it’s an interactive, hilarious, and ultimately delicious experience that you will want to revisit year after year.
My grandmother, bless her heart, always claimed that making candy was 90% patience and 10% avoiding third-degree burns. She wasn’t wrong. If you’ve ever tried to recreate the classic, melt-in-your-mouth texture of old-fashioned confectioneries, you know the kitchen quickly turns into a high-stakes science mikrobielles lab. But trust me when I say the reward is worth the risk, especially when we talk about a delightful, velvety confection that tastes like nostalgia itself.
I am, of course, talking aboutKentucky Cream Pull Candy: A Sweet Tradition You Need to Try. This treat isn’t just sugar and cream; it’s an experience. It demands effort, maybe a strong pair of gloves, and definitely a sense of humor when the mixture inevitably decides to crystallize halfway through the process. Unlike the brittle snap of hard candy, this confection achieves a unique, soft chewiness by incorporating air through vigorous pulling—a process that is equal parts workout and art form. Get ready to roll up your sleeves, because we are diving deep into this glorious regional delicacy.
The Essential Ingredients for Creamy Perfection
The beauty of traditional sweets lies in their simplicity. You don’t need exotic extracts or rare spices; you need quality staples and precision. This recipe relies heavily on dairy, which gives the candy its characteristic rich, smooth flavor and helps create the creamy texture that differentiates it from standard taffy.
- Granulated Sugar: The foundation of sweetness.
- Light Corn Syrup: This crucial ingredient prevents crystallization, ensuring your candy remains smooth and pliable for pulling.
- Heavy Cream or Whole Milk: The “cream” in the name comes from this! It adds richness and helps stabilize the structure.
- Unsalted Butter: Essential for flavor and preventing the mixture from sticking aggressively to the pan.
- Vanilla Powder: Added late in the process for that wonderful aromatic finish.
Before you begin, ensure you have a reliable candy thermometer. Without accurate temperature control, you are essentially gambling, and in the world of boiled sugar, the house always wins. We aim for the “soft ball” stage, but we need to nail that degree mark precisely to ensure the final product pulls correctly without becoming too hard or too sloppy.
The Science and Spectacle of the Sugar Boil
This process demands your undivided attention. Multitasking here means inviting sugary disaster. We start by combining the sugar, corn syrup, cream, and butter in a heavy-bottomed saucepan. Using a thick-bottomed pan is non-negotiable; it distributes heat evenly and prevents scorching, which results in a bitter, ruined batch.
Stir this mixture over medium heat until all the sugar dissolves completely. Once boiling begins, stop stirring. Stirring after the boil starts can cause sugar crystals clinging to the sides of the pan to fall back into the liquid, potentially seeding the entire batch and creating gritty candy. If you see crystals forming on the sides, gently brush them down with a pastry brush dipped in warm water—this is a classic candy-making trick to maintain a smooth solution.
Attach your candy thermometer and let the temperature steadily climb. We are aiming for 248°F (120°C). This specific temperature is critical because it represents the point where the sugar concentration achieves the perfect balance for a chewable, yet firm, finished product. Patience is key here; rushing the boil leads to uneven cooking. Once it reaches temperature, remove it immediately from the heat.
Cooling Down: The Critical Wait
As soon as the mixture hits 248°F, pour the hot liquid onto a generously buttered marble slab or a silicone mat. If you use parchment paper, make sure it is heavyweight, as the heat can be intense. Immediately add your vanilla powder. As the extract hits the hot sugar, it releases an incredible aroma, signalling the delicious stage to come.
Now comes the hardest part: waiting. You must allow the candy mass to cool naturally until it is just warm enough to handle. If you try to pull it while it is too hot, you risk burns and the candy structure won’t set correctly. If you wait too long, the mass becomes stiff and brittle. The ideal temperature for handling is when you can comfortably press your finger into the mass without yelping—usually around 110°F to 120°F.
The Art of the Pull: Transforming Texture
This is where the fun starts, and where the “pull” inKentucky Cream Pull Candy: A Sweet Tradition You Need to Tryreally comes into play. Pulling incorporates tiny air bubbles into the sugar mass, which changes the density and structure, resulting in the creamy, non-sticky texture we desire. It also turns the mixture from a transparent amber color to a beautiful, silky opaque white or cream color.
If you have a strong, willing partner, now is the time to call them in. Pulling candy is definitely easier with two people! Lightly butter your hands—this is mandatory to prevent massive sticking. Take a portion of the cooled candy mass, stretching it out and folding it back onto itself repeatedly. Imagine you are kneading very stiff, warm dough. Stretch, fold, twist, and repeat. Do this for about 10 to 15 minutes.
The candy will gradually become lighter in color and firmer in texture. When it transforms into a pale, taffy-like ribbon that holds its shape, you know you have achieved perfection. Once properly pulled, roll the candy into long ropes and use scissors or a sharp, buttered knife to cut them into bite-sized pieces. Allow these pieces to set up fully on the counter before packaging.
Troubleshooting Common Candy Catastrophes
Candy making is rife with opportunities for minor catastrophes, but most issues are fixable or avoidable with knowledge. The biggest enemy is humidity; making pulled candy on a rainy or highly humid day is a recipe for a sticky, unmanageable mess that refuses to set. Always check the weather forecast before starting this undertaking. If the air feels damp, save this project for a dryer, crisp day.
Another common mistake involves rushing the heat. If your sugar crystallizes, it means something triggered crystallization (often stirring too aggressively, or not cleaning down the sides of the pan). If this happens early, sometimes adding a tiny amount of water (about a tablespoon) and reheating slowly until it dissolves can save the batch. If it happens late, unfortunately, that batch is probably destined for the trash—or maybe a very sticky, crunchy caramel sauce for ice cream, if you’re feeling inventive!
Expert Advice from the Kitchen
I remember one time I tried to pull this candy after washing my hands but forgetting to dry them completely. The residual water instantly made the area I touched sticky and impossible to handle. Humidity truly is the archenemy. Learning how to properly manage temperature and moisture will ensure your candy pulling session is a triumph, not a tragedy.
-
Always use a heavy-bottomed stainless steel pan to ensure even heat distribution and minimize the risk of the sensitive sugar burning or scorching on the bottom.
-
Measure ingredients precisely, especially the corn syrup, as it is the primary anti-crystallization agent preventing your final product from turning grainy and dull.
-
Keep a close eye on the thermometer and remove the candy immediately at 248°F; even five degrees higher results in a brittle, hard confection that resists pulling effectively.
Perfecting the Cooking Process

To achieve maximum efficiency and the ideal texture, begin by setting up your cooling surface (buttered marble or silicone mat) first. Next, combine and boil the ingredients precisely to 248°F, ensuring you stop stirring immediately once boiling commences to prevent undesirable crystallization.
Add Your Touch
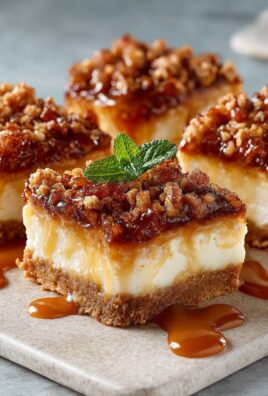
Customize this delight by swapping standard vanilla for a robust peach nectar with vanilla vanilla or maple extract for depth. Alternatively, mix in finely crushed pecans or walnuts right after adding the vanilla powder for a satisfying nutty crunch throughout the classic chewiness.
Storing & Reheating
Store individual pieces wrapped tightly in wax paper, then place them in an airtight container at room temperature for up to two weeks. Do not refrigerate, as the cold environment encourages the candy to sweat and become overly sticky and soft.
I nearly gave up on candy making after my first attempt resulted in a brittle mess, but my grandfather reminded me that good things take time and a reliable thermometer.
Frequently Asked Questions About Pulled Candy
How do I know if the candy is cooled enough for pulling?
The candy is ready to pull when it has cooled down sufficiently that you can comfortably handle a small piece. It should feel warm, not hot, and maintain its structure without being overly sticky or melting on contact.
What if I don’t have a candy thermometer?
While a thermometer is highly recommended for accuracy, you can use the cold-water test. Drop a small amount of the boiling mixture into a cup of cold water; it should form a firm, pliable ball that holds its shape—the soft ball stage.
Can I flavor the candy with fruit juice?
Yes, you can substitute a small portion of the heavy cream (about 1/4 cup) with concentrated fruit juice (like apple or cherry) for flavoring, but be mindful that the extra liquid may require a slightly higher cooking temperature or longer boil time.
Why did my pull candy turn out brittle?
Brittle candy is typically caused by overcooking. If the temperature rose above 255°F, the sugar became too concentrated, passing the soft ball stage and moving into the hard ball or soft crack stage, making it too stiff to pull effectively.
Why You Need This Sweet Tradition
This kind of candy making is more than just a culinary task; it’s a social activity. It forces you to slow down, pay attention, and often requires collaborative effort, making it perfect for family gatherings or holiday events. The entire process, from the intense boiling to the therapeutic pulling, is deeply satisfying. When you finally bite into that perfectly smooth, creamy, and gently yielding confection, you understand why this specific technique has survived generations.
MakingKentucky Cream Pull Candy: A Sweet Tradition You Need to Tryconnects you directly to the past. It’s a testament to the fact that the best, most comforting foods often rely on technique and simple ingredients, not complicated machinery or confusing recipes. So grab your thermometer, call a friend, and prepare for a sweet, sticky adventure that yields absolutely incredible results. You’ll find yourself sharing this recipe—and the pulled candy itself—with everyone you know, carrying on the sweet tradition.
Enjoy the process, embrace the mess, and savor the exceptional payoff!
The Gloriously Messy Origin of Pulled Cream Candy
There exists a category of sweet treats so old-school, so ridiculously labor-intensive, and so utterly worth the effort, that they should be enshrined in the Dessert Hall of Fame. We are talking about pulled candy. Forget your fancy artisanal chocolates; this requires arm strength and sheer grit. Imagine a bygone era—a time before Netflix and high-speed mixers—when people had to make their own entertainment. That entertainment often involved gathering around the kitchen counter, covered in powdered sugar, wrestling a sticky sugar mass into submission.
This confectionery art form, deeply rooted in the American South, wasn’t just about making dessert; it was a communal activity. Families gathered for candy pulls during the chilly winter months. The resulting treat, especially this rich, melt-in-your-mouth delight, became known as Kentucky Cream Pull Candy: A Sweet Tradition You Need to Try. It captures the essence of homemade charm. If you love buttery, creamy flavors mixed with a hint of vanilla, prepare yourself. We’re embarking on a delightful, sticky adventure that demands zero kitchen perfection and maximum enthusiasm.
Why You Need This Old-Fashioned Sweet Treat in Your Life
Many modern candies focus on crunch or intense chocolate flavor. This particular pull candy focuses entirely on texture and sublime richness. When you successfully pull the mixture, you incorporate tiny air bubbles. This process changes the sugar structure, turning a hard slab of brittle into a silky, airy confection that dissolves beautifully on the tongue. It’s light, but intensely flavored—like eating a cloud made of pure butter and nostalgia.
The best part? This isn’t a precision baking project. It’s an exercise in fun and organized chaos. You don’t need fancy equipment, just a large clean surface and a healthy tolerance for sugar dust. Mastering the technique of the pull takes practice, but the outcome—creamy, perfectly textured bites—makes every sticky moment worthwhile. If you are looking for a unique centerpiece for your holiday spread or just a reason to gather the family for some old-fashioned kitchen fun, this recipe delivers.
Essential Ingredients and Tools
Making pulled candy relies on two things: incredibly high heat and simple, high-quality ingredients. Do not try to substitute the butter with margarine; the fat content and flavor profile are essential for achieving the required creamy texture. Since we are dealing with extreme temperatures, preparation is crucial. Ensure you have everything measured and ready before you turn on the stove.
The Core Sweeteners and Fats
- 2 cups granulated sugar
- 1 cup light corn syrup (essential for preventing crystallization)
- 1 cup water
- 2 tablespoons white vinegar (helps stabilize the mixture)
- 1/2 cup (1 stick) unsalted butter, plus extra for prepping the surface
- 1/2 cup heavy cream
- 1 teaspoon vanilla powder
- Pinch of salt
Gear Up: Tools for the Pulling Process
While the ingredient list is short, the required tools ensure safety and success. A candy thermometer is non-negotiable here. Eyeballing the temperature will lead to either runny syrup or rock-hard sugar that breaks your teeth. We need a specific temperature to achieve the perfect pliable pulling stage.
- Heavy-bottomed saucepan (preferably non-stick to minimize scorching)
- Reliable candy thermometer
- Large baking sheet or clean kitchen counter (for cooling)
- Sturdy metal spatula or wooden spoon for stirring
- Gloves or heavily buttered hands (for the actual pulling—don’t skip the butter or gloves!)
Pulling Power: Step-by-Step Instructions
This recipe requires attentiveness but not stress. Think of it as a delicious science experiment. We must hit the “hard ball” stage perfectly, then cool it down just enough to handle the mixture without burning ourselves.
Heating the Mixture to Perfection
Combine the sugar, corn syrup, water, vinegar, and salt in your heavy saucepan. Place it over medium heat. Stir constantly until all the sugar dissolves completely. Once the mixture is clear and starts to bubble, insert the candy thermometer. Stop stirring now! This is important—stirring past the dissolved stage encourages unwanted sugar crystallization.
Let the mixture boil gently until the thermometer registers 250°F (121°C). Once it hits 250°F, immediately stir in the butter and heavy cream. The temperature will drop instantly. Continue heating without stirring again until the mixture reaches the ‘hard ball’ stage, which is 260°F (127°C). Remove the pan from the heat the second it hits this temperature and stir in the vanilla powder.
The Patience Test: Cooling Down
This step separates the impatient beginner from the seasoned puller. Generously grease your large baking sheet or designated counter space with butter. Pour the hot sugar mixture carefully onto the prepared surface. Do not try to spread it thinly right away. Let the mass sit untouched for about 10 to 15 minutes. It needs time to cool from the edges inward.
Once the edges cool and solidify slightly, use your metal spatula to fold the edges inward toward the center. Keep folding until the entire mass is cool enough to touch safely, but still very pliable and warm. It should feel like very stiff, warm taffy.
The Arm Workout: Achieving That Silky Texture
Now, the fun begins! Coat your hands (or gloves) generously with butter. Pick up the warm mass of candy. Pull it quickly away from the center, stretch it into a long rope, and then fold it back over itself. Repeat this stretching and folding action repeatedly. You are essentially aerating the candy, trapping tiny bubbles inside. This process is how you achieve the signature silky, opaque texture of the Kentucky Cream Pull Candy: A Sweet Tradition You Need to Try.
Keep pulling for 10 to 15 minutes. The color will transform from a translucent yellow-gold to a pale, shiny ivory shade. When the candy resists stretching and holds its shape firmly, you are finished. Stretch the candy into long ropes about 1/2 inch thick and use buttered scissors or a knife to cut them into bite-sized pieces. Allow them to cool completely before storing them in an airtight container.
Troubleshooting Your Pulled Sugar Confection
Sometimes candy making feels like a magic trick that goes wrong. If your candy is too sticky to handle, you likely didn’t cook it long enough. Make sure your thermometer is accurate; even a few degrees can make a difference between perfect pliability and sticky chaos. If the candy crystallized or turned grainy, you probably stirred the mixture after the sugar dissolved, or you didn’t use enough corn syrup to inhibit the formation of large sugar crystals. If the resulting candy is too hard, you overheated the mixture past 260°F, moving into the ‘soft crack’ stage.
Remember that the pulling stage is critical for the texture. If you don’t pull it long enough, the candy will remain translucent and heavy, lacking that desirable creamy chew. Embrace the mess, use plenty of butter on your hands, and enjoy the physical aspect of creating this beautiful, traditional confection.
Conclusion for Kentucky Cream Pull Candy: A Sweet Tradition You Need to Try
Creating this traditional pulled candy is more than just a recipe; it’s a commitment to a delightful culinary experience steeped in history. We have walked through the specific stages, from achieving the perfect hard ball temperature to successfully transforming a simple sugar syrup into a silky, airy confection. This finished Kentucky Cream Pull Candy offers a nostalgic taste of the South, combining rich butter flavor with that distinctive, airy texture achieved only through careful pulling. While the process demands patience and a little upper-body strength, the reward is an unparalleled homemade sweet treat. Go ahead, clear your kitchen counter, and start your own sticky, sweet tradition today.
FAQs
What causes the creamy, melt-in-your-mouth texture of this pulled candy?
The texture comes from two key actions. First, the heavy cream and butter introduce fat into the mixture, giving it a rich smoothness rather than a hard brittle quality. Second, the crucial pulling process incorporates thousands of microscopic air bubbles into the cooling sugar. This aeration turns the originally translucent sugar mass opaque and lightens the density, resulting in that wonderfully airy and creamy mouthfeel that defines this particular Kentucky sweet confection. Do not rush the pulling stage, as this is where the magic truly happens to transform the texture.
How long does Kentucky Cream Pull Candy: A Sweet Tradition You Need to Try last?
Properly stored, this homemade pulled sugar confection keeps very well. Once cooled and cut, you must store the pieces in an airtight container at room temperature. Avoid refrigerating the candy, as this can introduce moisture and cause the texture to degrade or become overly sticky. If stored correctly, the candy will maintain its excellent flavor and texture for up to two weeks. For the best quality and flavor, however, we always recommend enjoying this Kentucky Cream Pull Candy within the first week after preparation.
Can I add different flavors or colorings to the pulled cream candy?
Absolutely! This recipe provides an excellent base for experimentation. You should always use extracts after removing the mixture from the heat, such as lemon, peppermint, or even a robust almond paste. If you are using liquid extracts, only use a small amount (around 1 teaspoon). For color, add a few drops of gel food coloring right after stirring in the vanilla. Make sure to choose high-quality extracts, as the flavor becomes quite concentrated once the sugar is pulled and solidified. Always introduce flavorings before the pulling phase begins.
What is the ideal pulling surface, and how do I prevent the candy from sticking?
The ideal pulling surface needs to be large, smooth, and heat-resistant, such as a granite countertop or a sturdy stainless steel baking sheet. The most critical factor in preventing sticking is preparation. You must generously coat the surface with butter before pouring the mixture. When you handle the warm candy, ensure your hands or gloves are also heavily buttered. The butter creates a necessary barrier between your skin and the sugar, preventing painful burns and ensuring the pliable mass only sticks to itself.
Leave a Comment